Debugging
In this guide, we will explore multiple ways of debugging your AdonisJS applications, from using the VSCode debugger to using Dump and Die and viewing the debug logs of the framework.
Debug using the VSCode debugger
Debugging AdonisJS applications using the VSCode debugger is straightforward. You only need to create a .vscode/launch.json file and use the Node.js debugger.
In the following example, we define a configuration to start the AdonisJS development server in the debug mode and then attach the VSCode debugger to it.
See also: VSCode Debugging Docs
{
  "version": "0.2.0",
  "configurations": [
    {
      "type": "node",
      "request": "launch",
      "name": "Dev server",
      "program": "${workspaceFolder}/ace.js",
      "args": ["serve", "--hmr"],
      "skipFiles": ["<node_internals>/**"]
    }
  ]
}
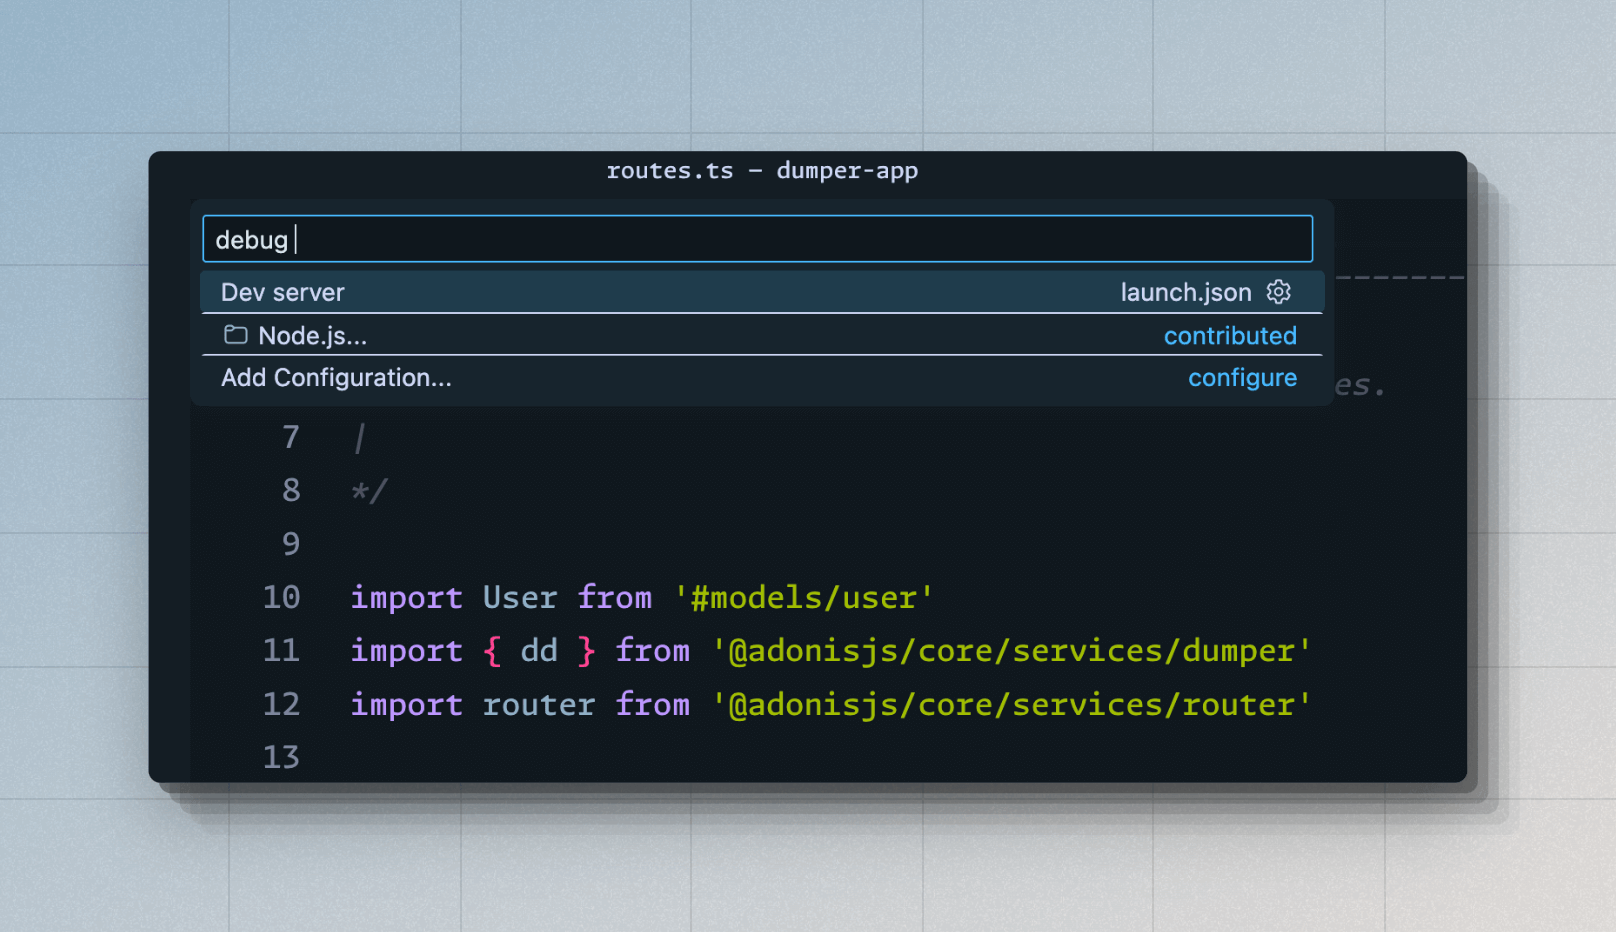
To start debugging:
- Open the Command Palette with
(CMD + Shift + P). - Search for Debug: Select and Start Debugging. You will find a list of launch options from the
.vscode/launch.jsonfile. - Select the Dev server option to run the HTTP server with the VSCode debugger.

Debugging tests
You may define another launch option to run tests in the debug mode.
{
  "version": "0.2.0",
  "configurations": [
    {
      "type": "node",
      "request": "launch",
      "name": "Dev server",
      "program": "${workspaceFolder}/ace.js",
      "args": ["serve", "--hmr"],
      "skipFiles": ["<node_internals>/**"]
    },
    {
      "type": "node",
      "request": "launch",
      "name": "Tests",
      "program": "${workspaceFolder}/ace.js",
      "args": ["test", "--watch"],
      "skipFiles": ["<node_internals>/**"]
    }
  ]
}
Debugging all other Ace commands
Defining individual launch options for every ace command is not a practical option. Therefore, you can define an attach configuration within the .vscode/launch.json file.
In attach mode, VSCode will attach its debugger with an already running Node.js process, given the process was started with the --inspect flag from within the VSCode integrated terminal.
Let's start by modifying the .vscode/launch.json file and adding the following configuration to it.
{
  "version": "0.2.0",
  "configurations": [
    {
      "type": "node",
      "request": "attach",
      "name": "Attach Program",
      "port": 9229,
      "autoAttachChildProcesses": true,
      "skipFiles": ["<node_internals>/**"]
    },
    {
      "type": "node",
      "request": "launch",
      "name": "Dev server",
      "program": "${workspaceFolder}/ace.js",
      "args": ["serve", "--hmr"],
      "skipFiles": ["<node_internals>/**"]
    },
    {
      "type": "node",
      "request": "launch",
      "name": "Tests",
      "program": "${workspaceFolder}/ace.js",
      "args": ["test", "--watch"],
      "skipFiles": ["<node_internals>/**"]
    }
  ]
}
To start debugging in attach mode:
- Open the Command Palette with
(CMD + Shift + P). - Search for Debug: Select and Start Debugging. You will find a list of launch options from the
.vscode/launch.jsonfile. - Select the Attach Program option.
- Run an Ace command with the
--inspectflag. For example:node --inspect ace migration:run
Debugging Edge templates
You can debug Edge templates similar to your application code written in TypeScript. However, with Edge, you cannot use the breakpoints provided by VSCode. Instead, you must use the @debugger tag to define an in-code breakpoint.
The debugger will show the compiled output for Edge templates.
@debugger
Dump and Die
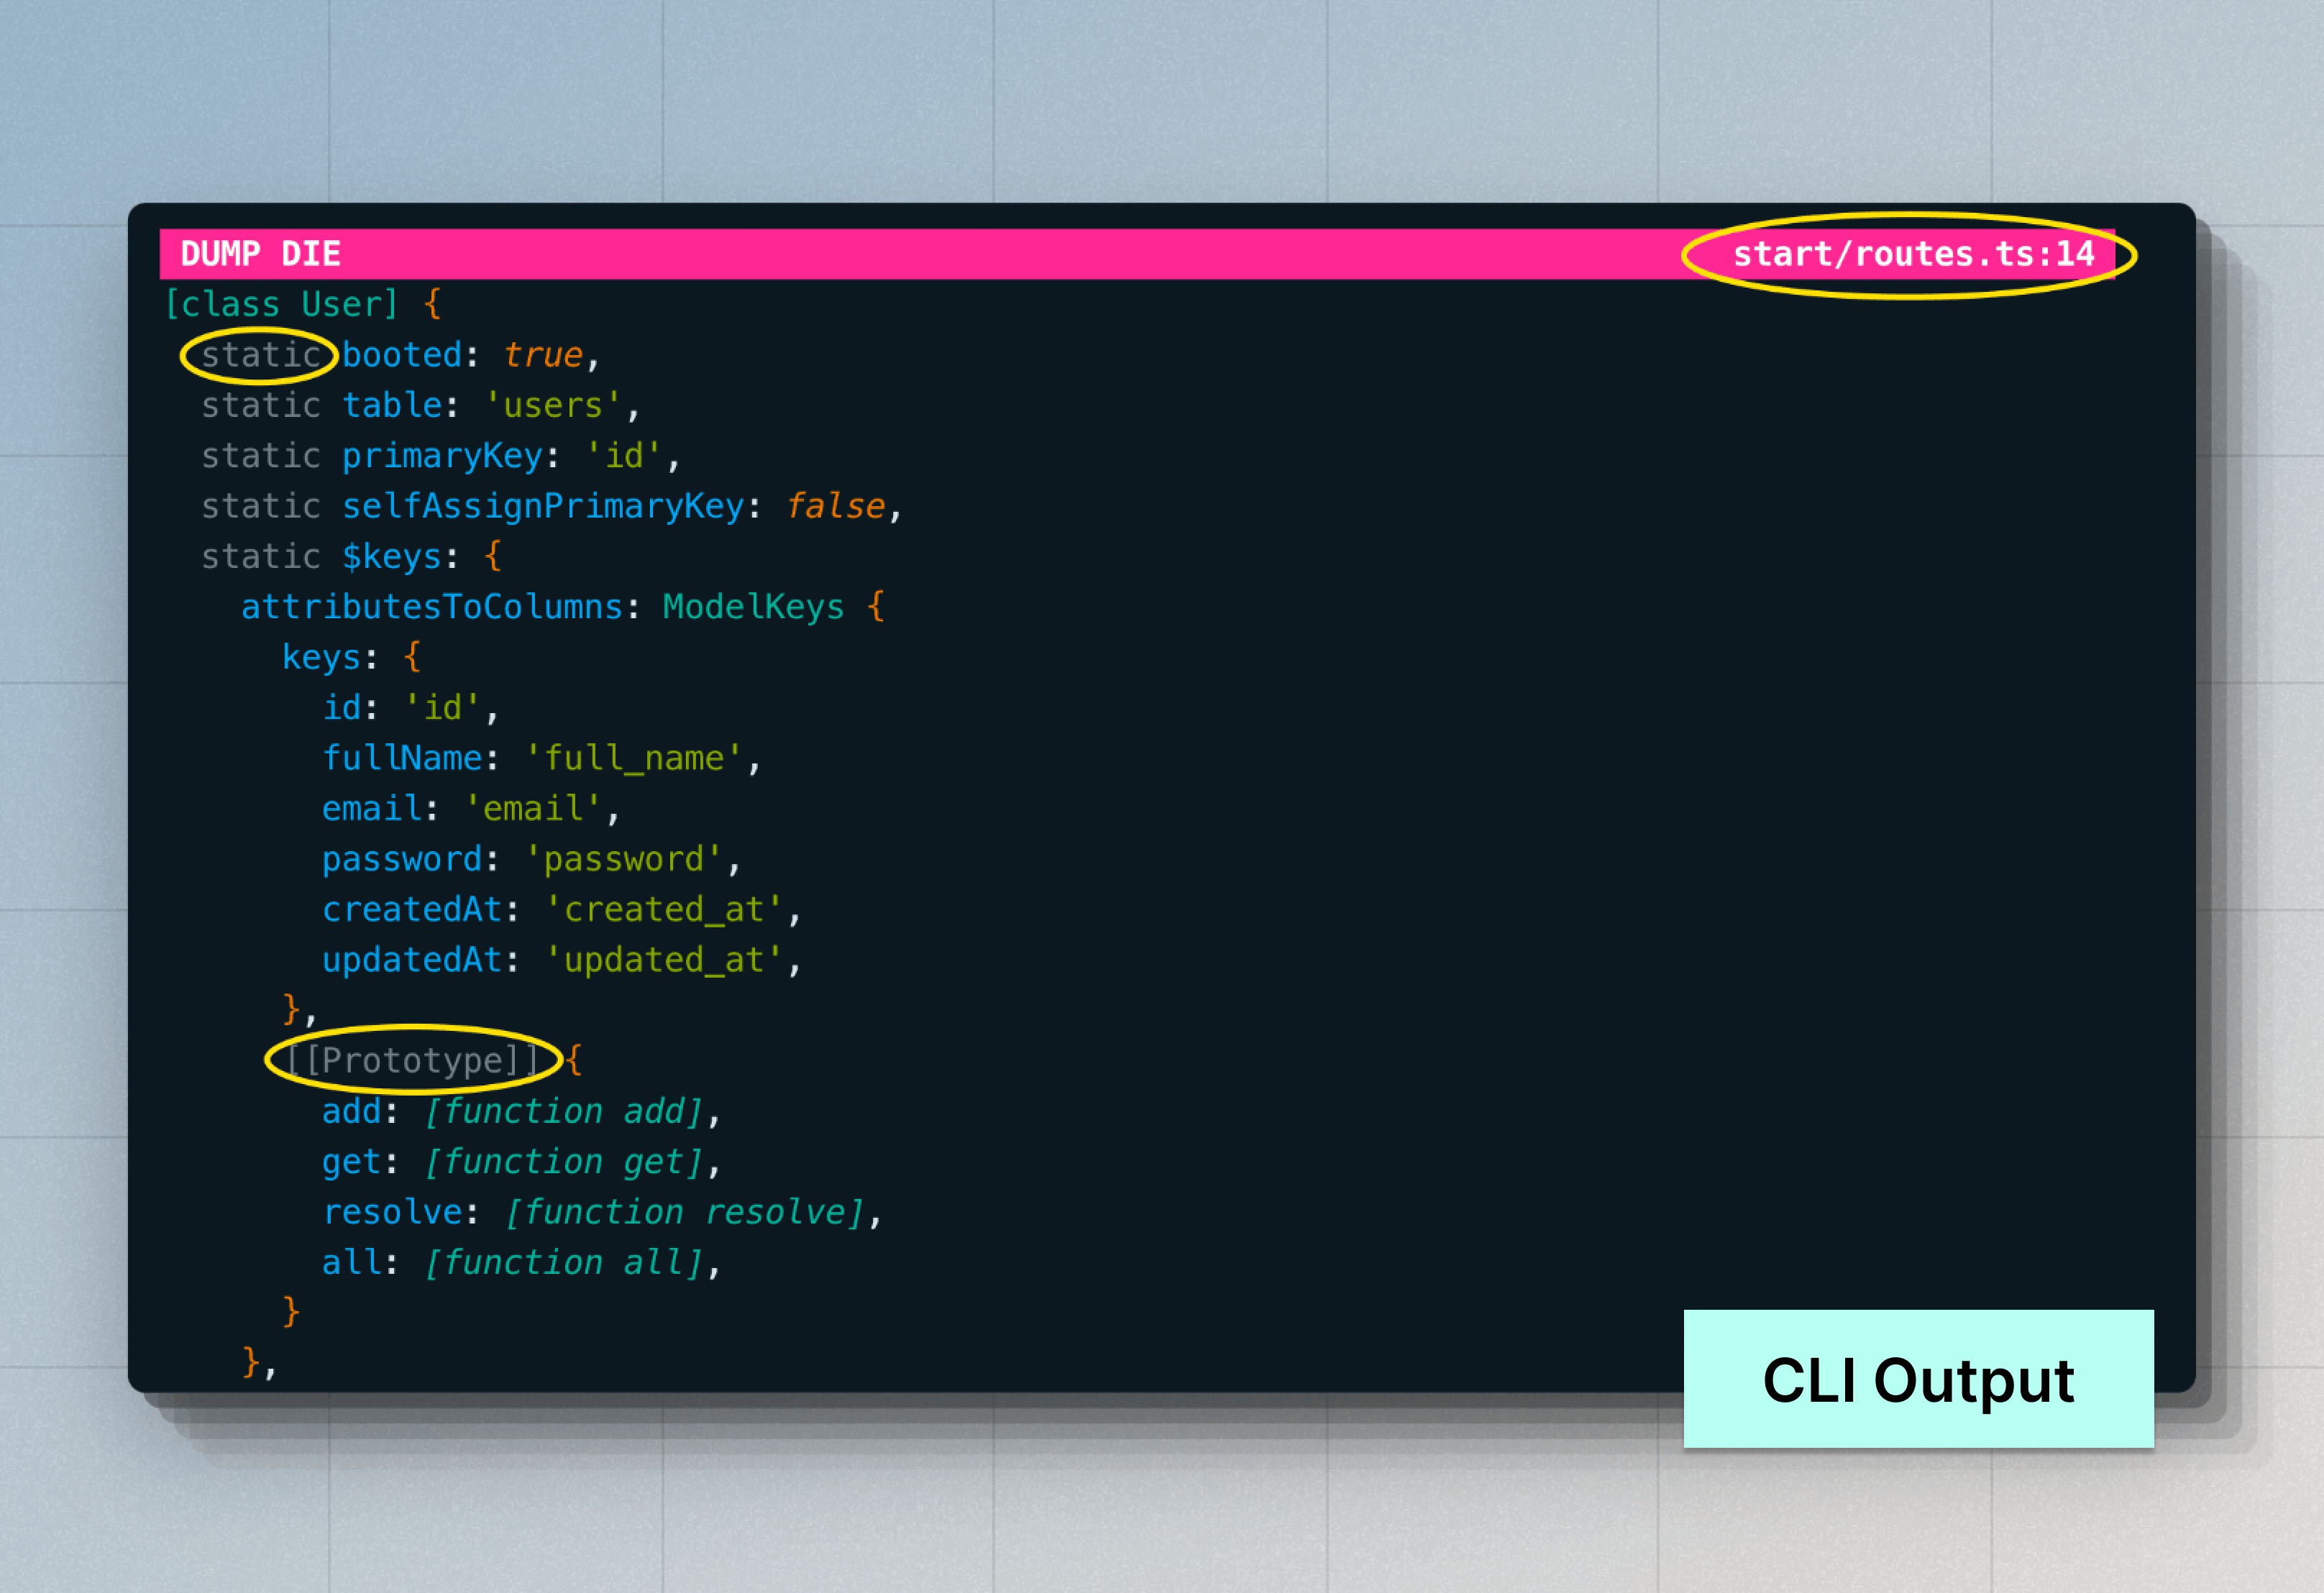
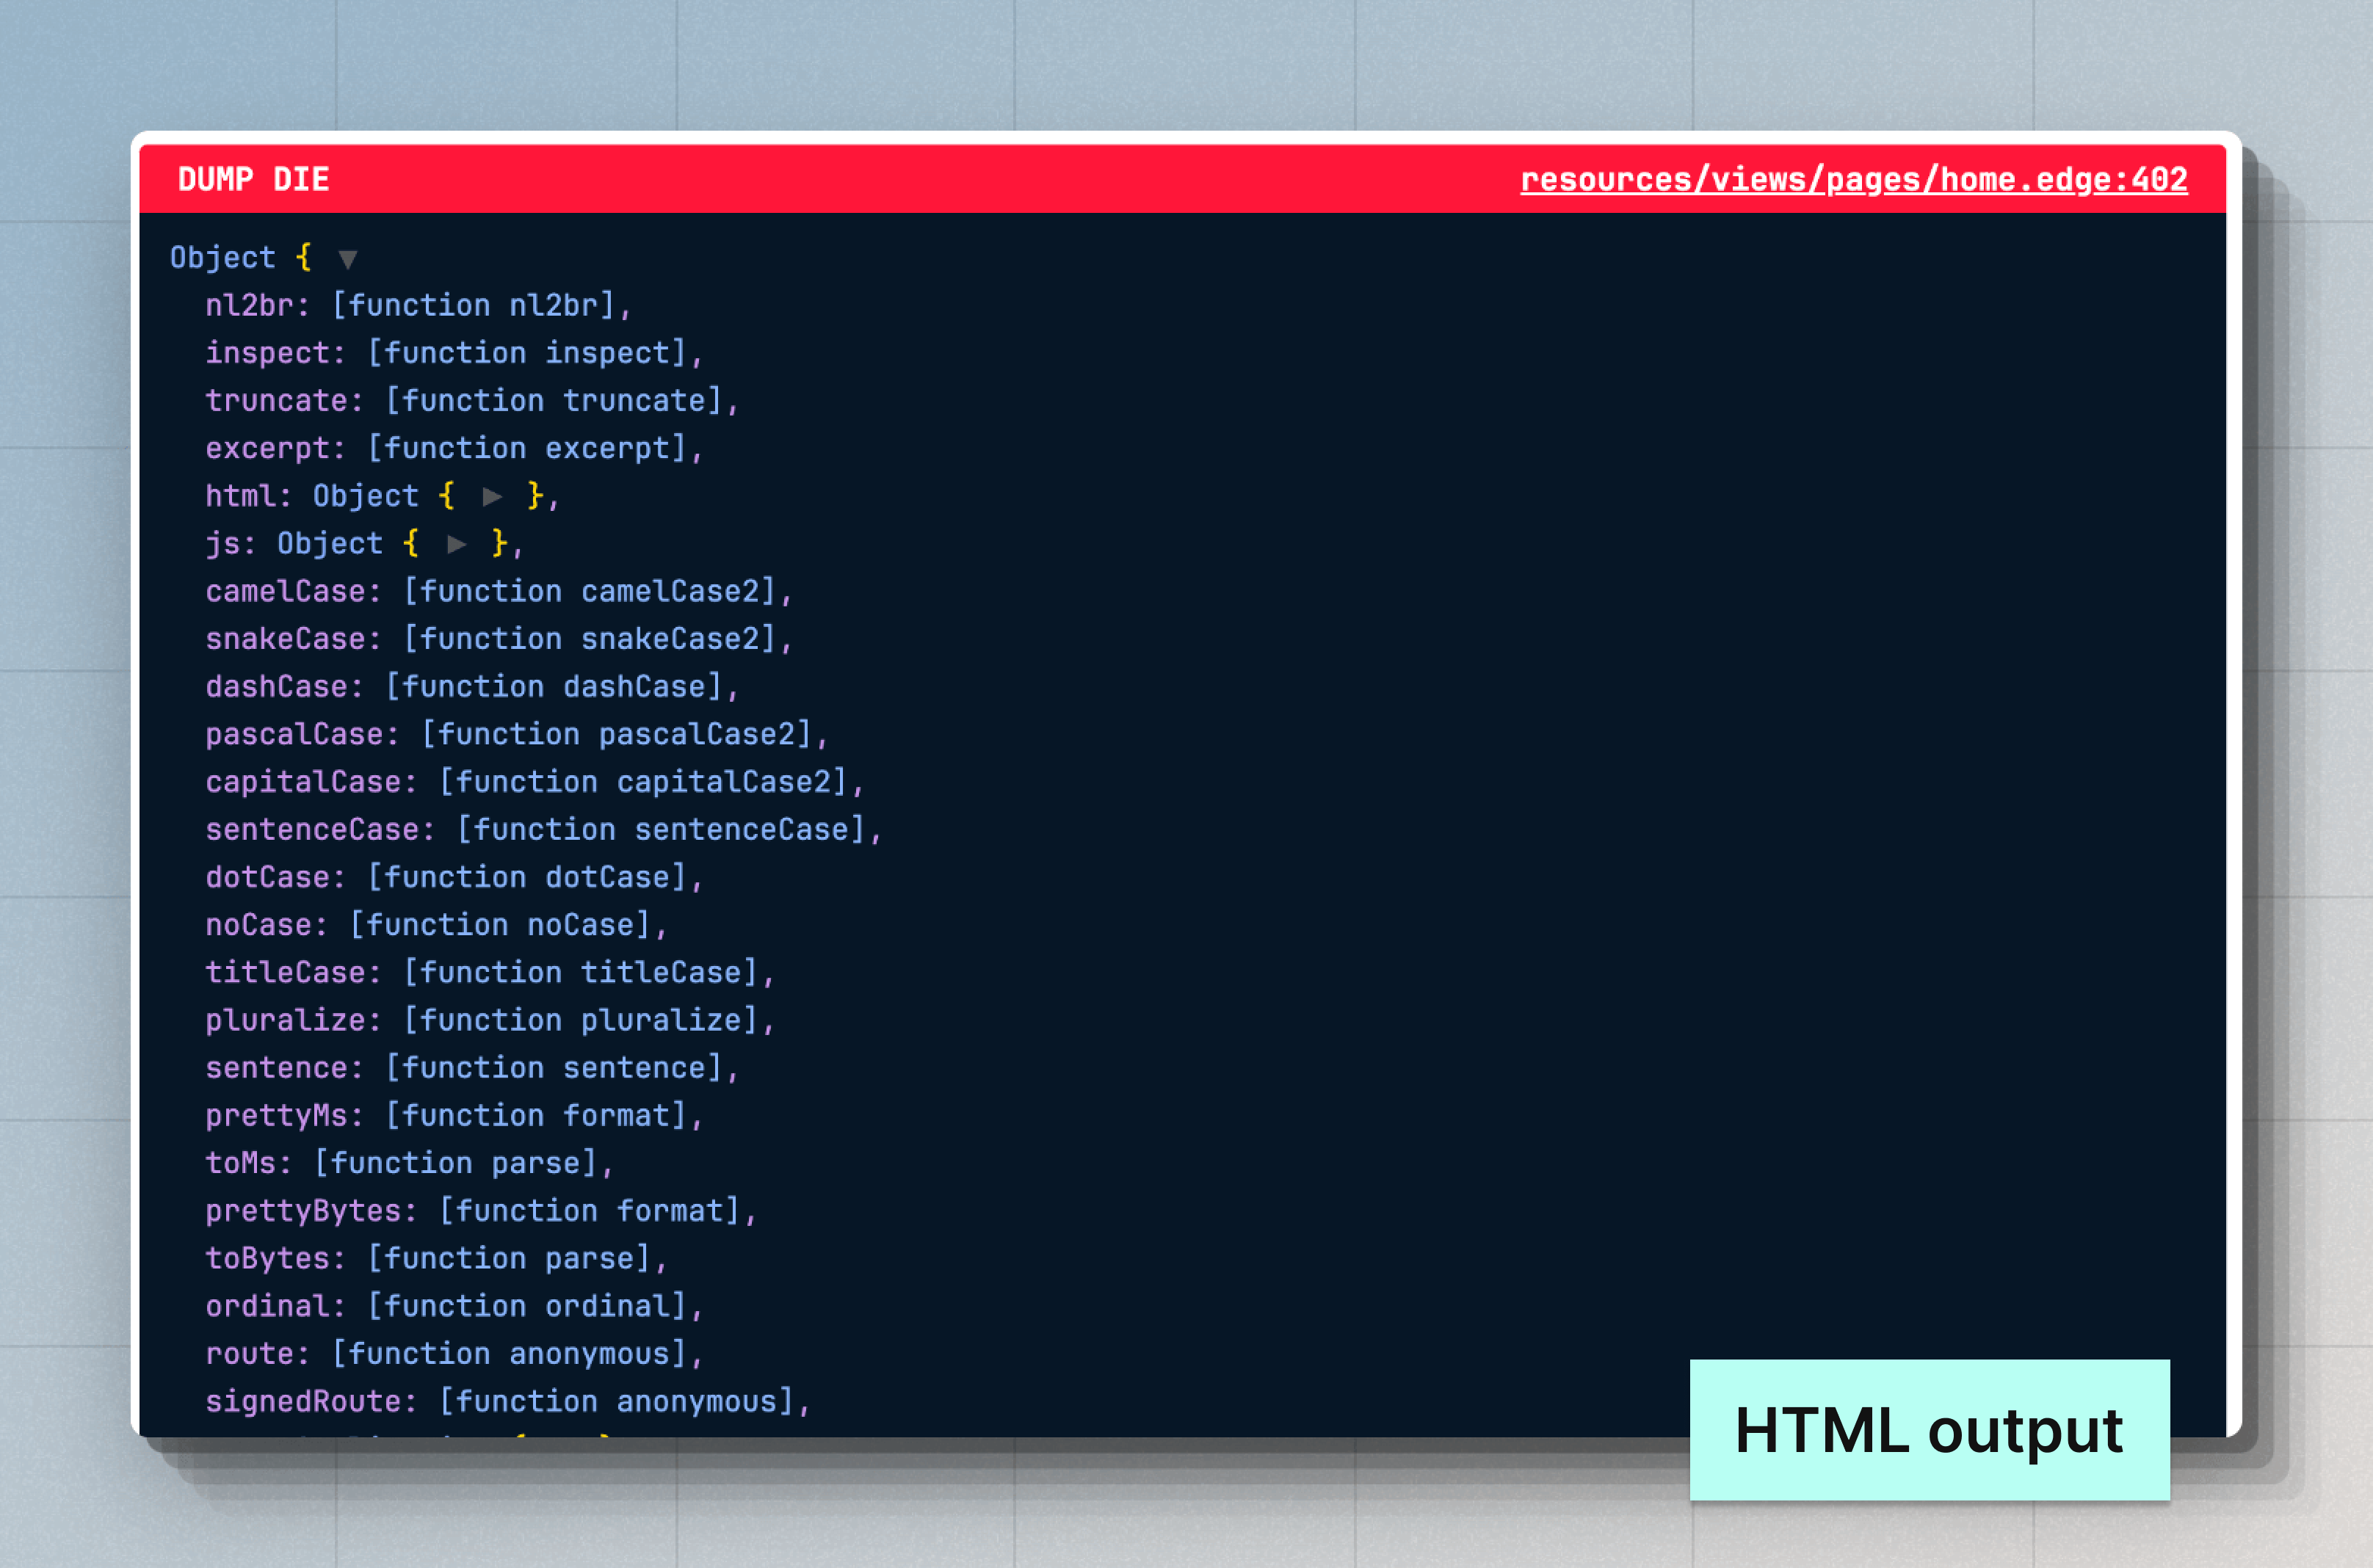
Dump and Die (known as dd) is similar to the most loved debugging technique, console.log. However, the dd helper will halt the execution by throwing an exception and displaying the output inside the browser or the terminal.
The output is rendered as an HTML document when you use the dd helper during an HTTP request. Otherwise, the output is displayed within the terminal.
import User from '#models/user'
import router from '@adonisjs/core/services/router'
import { dd } from '@adonisjs/core/services/dumper'

router.get('/users', async () => {
  const users = await User.all()
  /**
   * Visit the "/users" endpoint to view the dumped values
   */
  dd(users)
  return users
})
The output of dd slightly differs from what you see when using console.log.
- You can see the source code location where the value was dumped.
- You can view static properties of a class and prototype properties of an object.
- By default, nested values up to 10 levels deep are displayed.
- Support for multiple themes for the HTML output. You can choose between
nightOwl,catppuccin, andminLight.


Edge helpers for debugging
You can use the dd helper within Edge templates via the @dd tag. Additionally, you can use the @dump helper, which doesn't throw an exception and continues rendering the rest of the template.
{{-- Dump template state and die --}}
@dd(state)

{{-- Dump template state and continue rendering --}}
@dump(state)
When using the @dump helper make sure there is an EdgeJS Stack named "dumper" on the page. The script and styles used by the @dump helper will be written to this stack for inclusion in the final HTML output.
<!DOCTYPE html>
  <html lang="en">
  <head>
    <meta charset="UTF-8" />
    <meta name="viewport" content="width=device-width, initial-scale=1.0" />
    @stack('dumper')
  </head>
  <body>
    @dump(state)
  </body>
</html>
Dumper settings
You can configure the dumper settings inside the config/app.ts file. This file should export a dumper configuration object, as shown below.
/**
 * The global configuration used by the "dd" helper. You can
 * separately configure the settings for both the "console"
 * and the "html" printers.
 */
export const dumper = dumperConfig({
  /**
   * Settings for the console printer
   */
  console: {
    depth: 10,

    /**
     * Objects that should not be further expanded. The
     * array accepts an array of object constructor
     * names.
     */
    collapse: ['DateTime', 'Date'],
    inspectStaticMembers: true,
  },

  /**
   * Settings for the HTML printer
   */
  html: {
    depth: 10,
    inspectStaticMembers: true,
  },
})
- showHidden
-
When set to
true, the non-enumerable properties of an object will be processed. Default:false - depth
-
The depth at which to stop parsing nested values. The depth is shared among all tree-like data structures. For example, Objects, Arrays, Maps, and Sets. Default:
5 - inspectObjectPrototype
-
Inspect prototype properties of an object. The non-enumerable properties of the prototype are included by default. Default:
'unless-plain-object'.- When set to
true, the prototype properties will be processed for all the objects. - The prototype properties are never processed when set to
false. - When set to
'unless-plain-object', the prototype properties of class instances will be processed.
- When set to
- inspectArrayPrototype
-
Inspect prototype properties of an Array. Default:
false. - inspectStaticMembers
-
Inspect static members of a class. Even though functions and classes are technically the same, this config only applies to functions defined using the
[class]keyword. Default:false. - maxArrayLength
-
Maximum number of members to process for
Arrays,Maps, andSets. Default:100. - maxStringLength
-
Maximum number of characters to display for a string. Default:
1000. - collapse
-
An array of object constructor names that should not be further inspected.
Framework debug logs
You can view the framework debug logs using the NODE_DEBUG environment variable. The NODE_DEBUG flag is supported by the Node.js runtime, and you may use it to view logs for one or more modules using the module name.
For example, you can view logs for all AdonisJS packages using the NODE_DEBUG="adonisjs:*" value.
NODE_DEBUG="adonisjs:*" node ace serve --hmr
Similarly, you may use the NODE_DEBUG environment variable to view logs from the Node.js native modules like fs, net, module, and so on.
NODE_DEBUG="adonisjs:*,net,fs" node ace serve --hmr